Workflow Management - Create, Edit, and Assign Workflows
What is a Workflow in FlowInquiry?
Each workflow in FlowInquiry has one initial state and at least one final state, ensuring a structured progression from request creation to completion.
Workflows have two scopes:
- Team Workflows: Created within a specific team and used exclusively by that team.
- Global Workflows: Defined at a global level and can be cloned into team workflows for customization.
By configuring workflows, organizations can standardize processes, automate approvals, and track request statuses efficiently. Workflows in FlowInquiry define the structured process of handling requests, ensuring smooth progression through different stages. Each workflow consists of:
- States: Represent various stages a request passes through.
- Transitions: Define allowed movements between states.
- SLAs (Service Level Agreements): Set expected time limits for each transition to ensure timely processing.
By configuring workflows, organizations can standardize processes, automate approvals, and track request statuses efficiently.
By configuring workflows, organizations can standardize processes, automate approvals, and track request statuses efficiently.
Creating a Workflow
- Navigate to the Workflows section from the main menu.
- Click on New Workflow.
- Enter a name and description for the workflow.
- Define the workflow states and transitions.
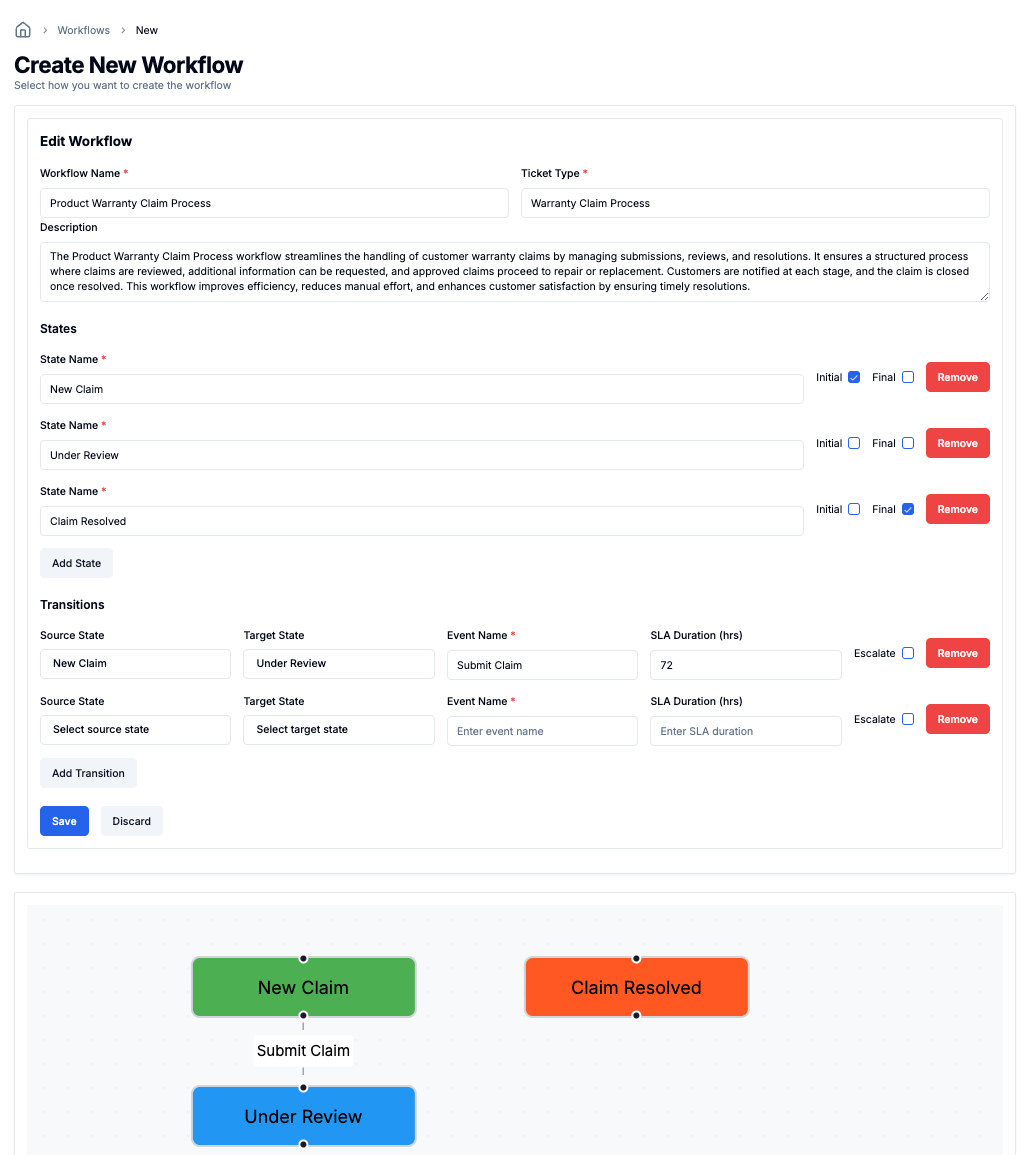
- Set up any required SLAs or automated actions.
- Click Save to finalize the workflow configuration.
- After save workflow successfully then you are able to review and verify if workflow setup properly
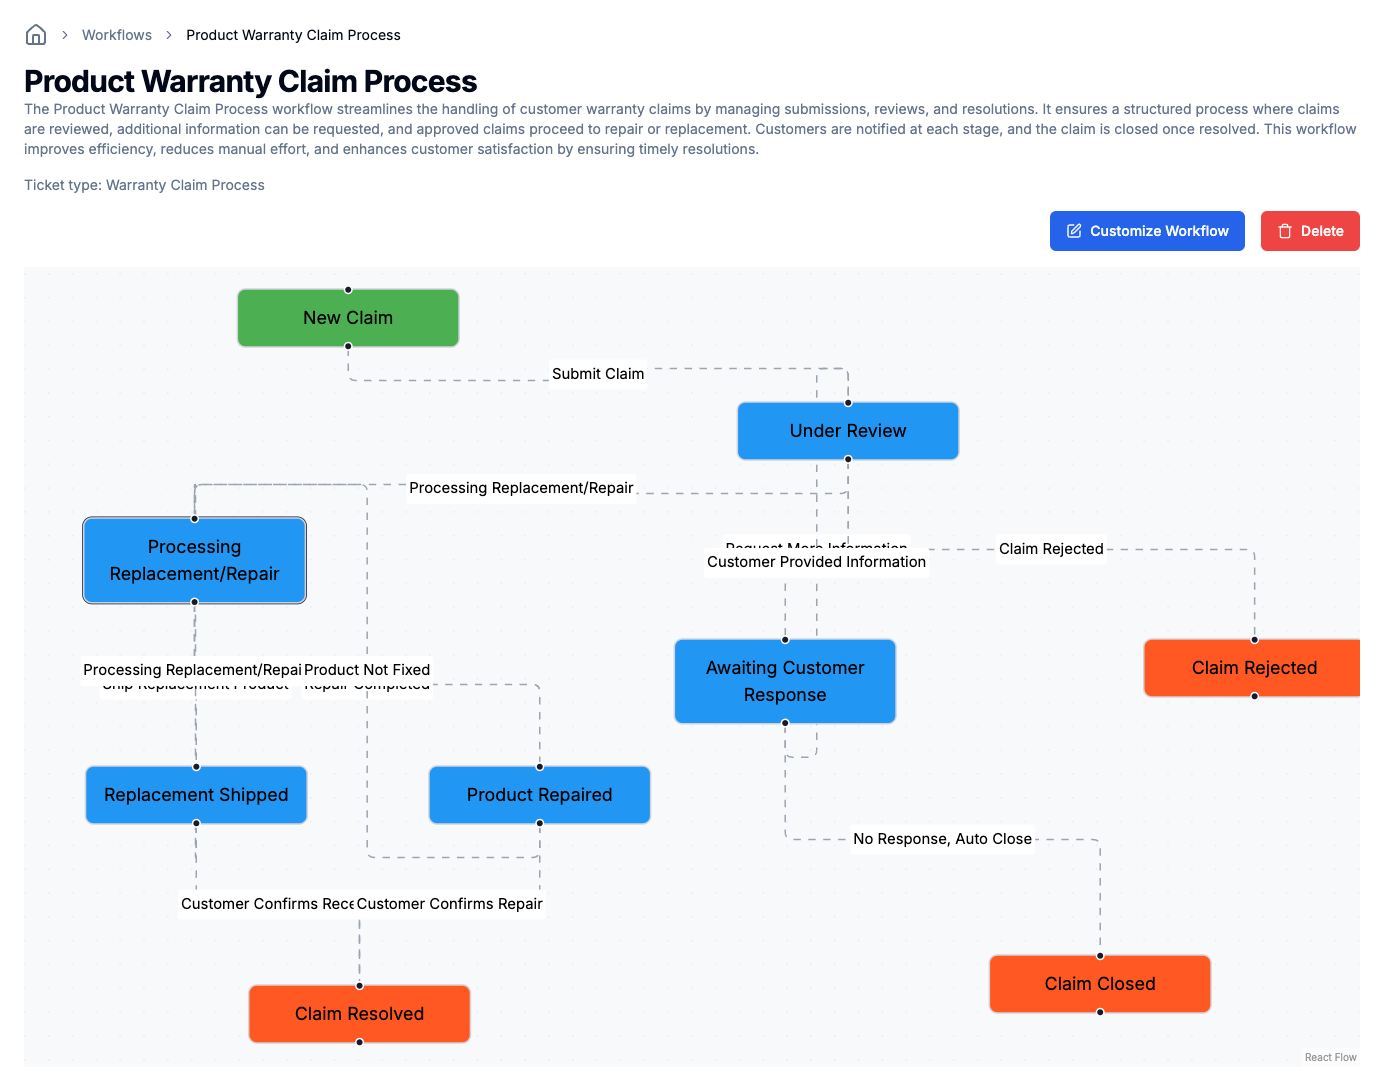
Editing a Workflow
- Open the Workflows section.
- Select the workflow you want to edit.
- Click Customize Workflow to modify states, transitions, or SLAs.
- Save changes to apply updates.
Creating a Workflow for a Team
- Navigate to the Teams section.
- Select the team where you want to create a workflow.
- Click on New Workflow within the team settings.
- There are two options to create a new workflow for the team:
- Create from Scratch: Start building a new workflow from the ground up, following a similar process as creating a global workflow.
- Clone from Global Workflow: Create a copy of a global workflow and customize it to fit the team’s needs.
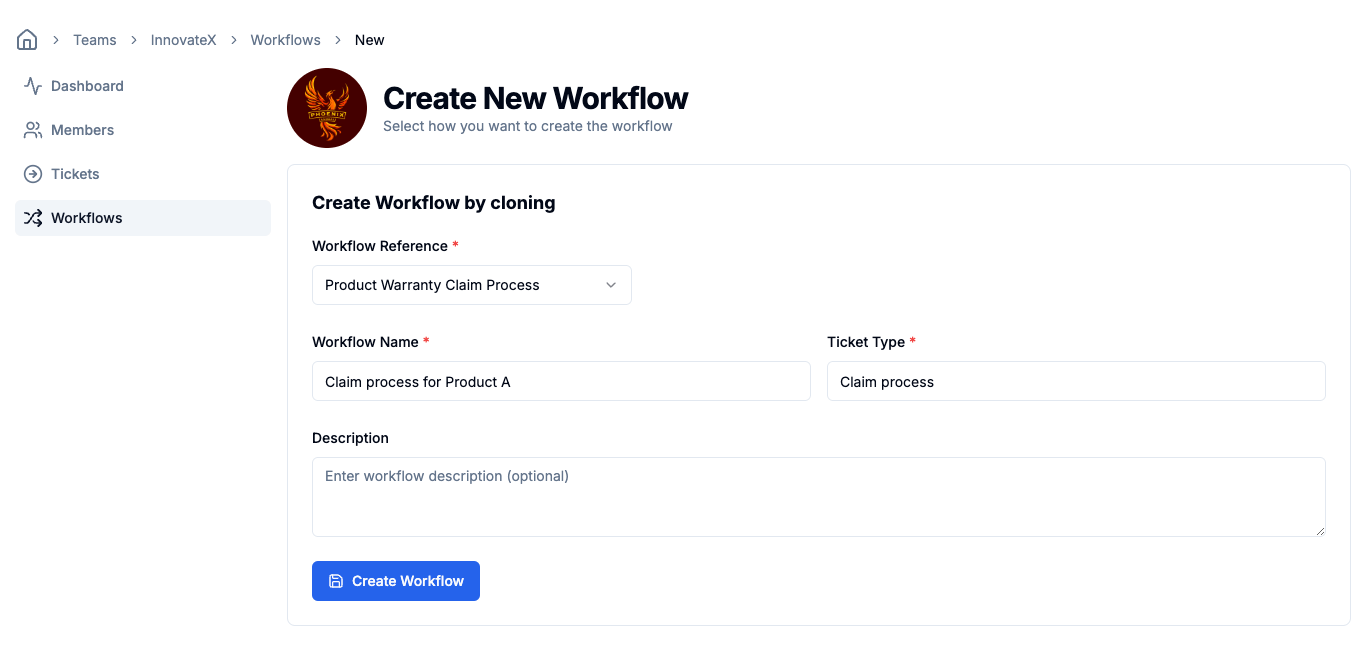
- If the user creates a workflow from scratch, they will follow a similar process as creating a global workflow. If the user selects Clone from Global Workflow, they need to choose the workflow to be cloned and provide the necessary details to customize it for the team.
- Click Create Workflow to finalize the workflow setup. After saving the new workflow successfully, it will be ready for use within the team scope.
Last updated on