Getting Started
Logging In
- Open your web browser and navigate to the FlowInquiry login page.
- Enter your registered email and password.
- Click the Login button.
- If Multi-Factor Authentication (MFA) is enabled (available in the Premium edition only), follow the on-screen instructions to complete authentication.

Use the default admin credentials [email protected] / admin (if you are using FlowInquiry Premium or Open Source edition) or use your registered account (for the Cloud edition).
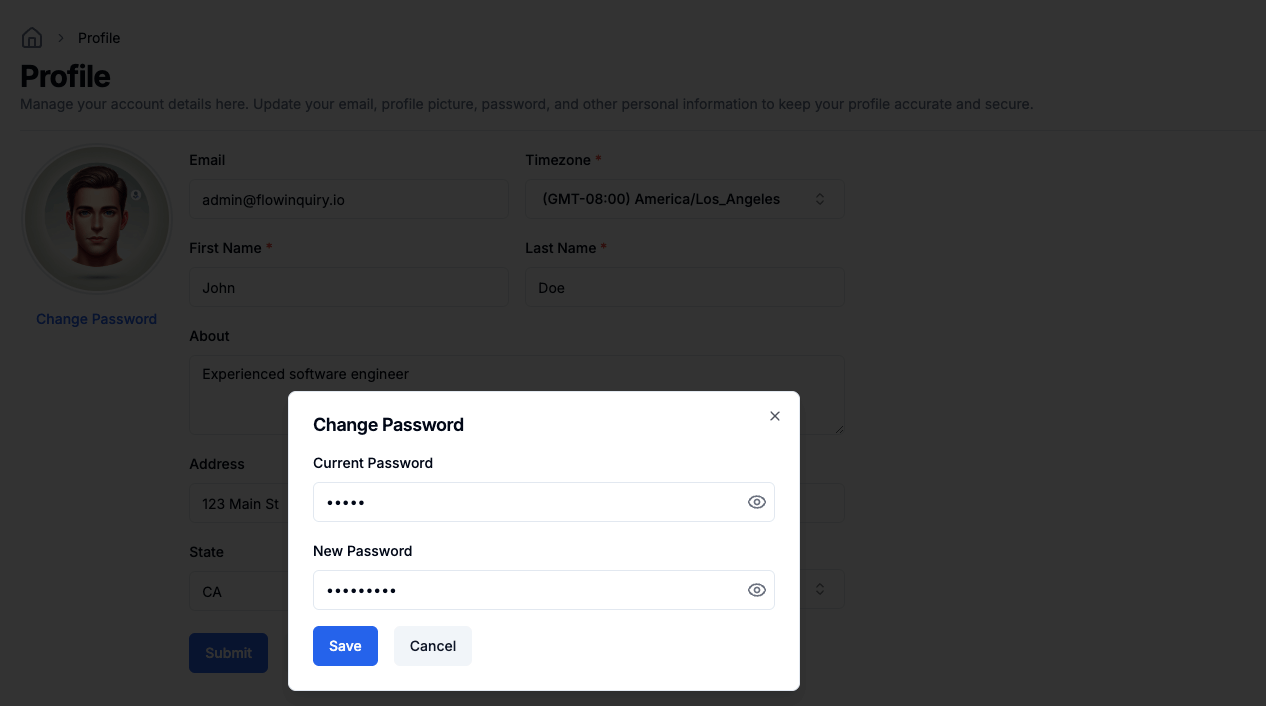
Changing Your Password
- Click on your profile icon in the top-right corner.
- Select Profile from the dropdown menu.
- In profile page, click Change Password.
- Enter your current password and the new password.
- Click Save Changes.
- You will receive a confirmation notification upon successful password update.
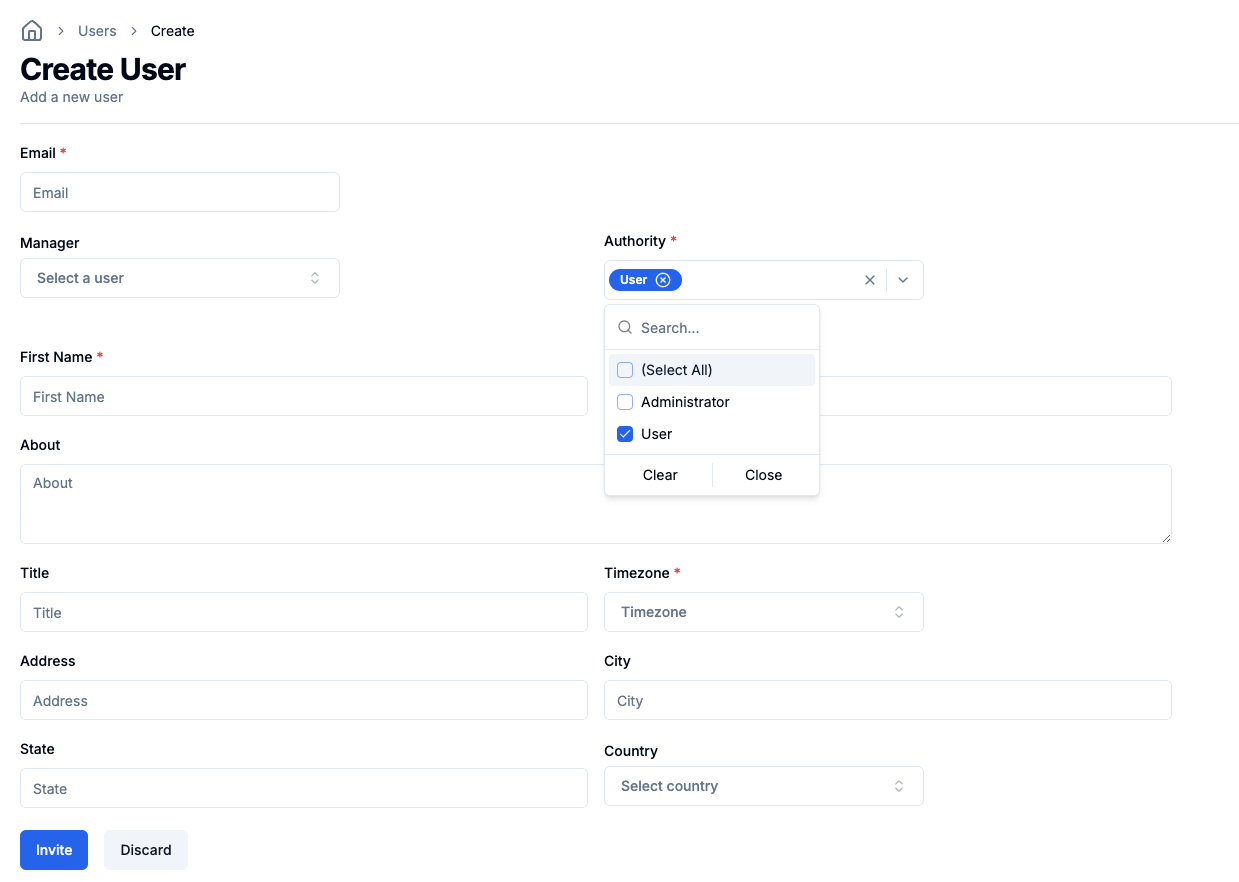
Adding a New User
- Go to the Users section under Settings.
- Click the Invite User button.
- Enter the required details such as Name, Email, and Role. Optionally, add personal user information.
- Click Invite to send the invitation.
- The new user will receive an email with login instructions and a link to set up their account.
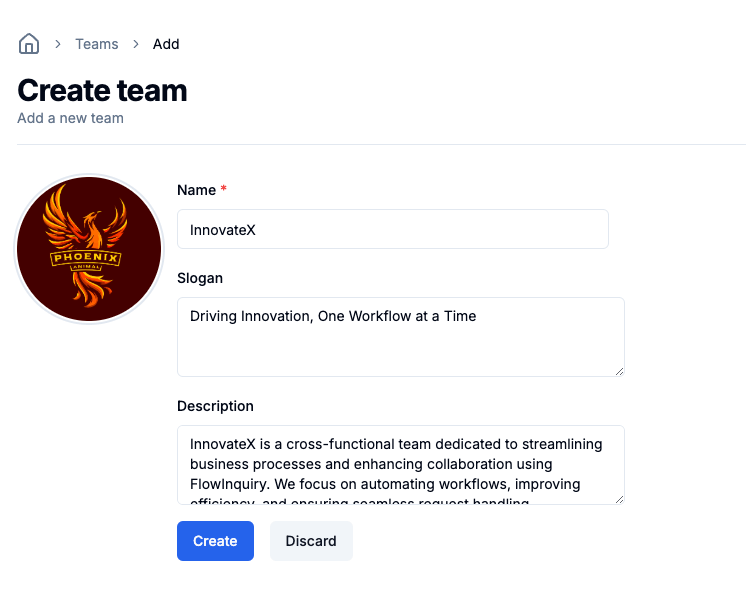
Creating a New Team
- Go to Teams from the main navigation menu.
- Click on New Team.
- Provide a team name, an optional slogan, and a description. You can also upload a custom team logo.
- Click Create to finalize the team setup.
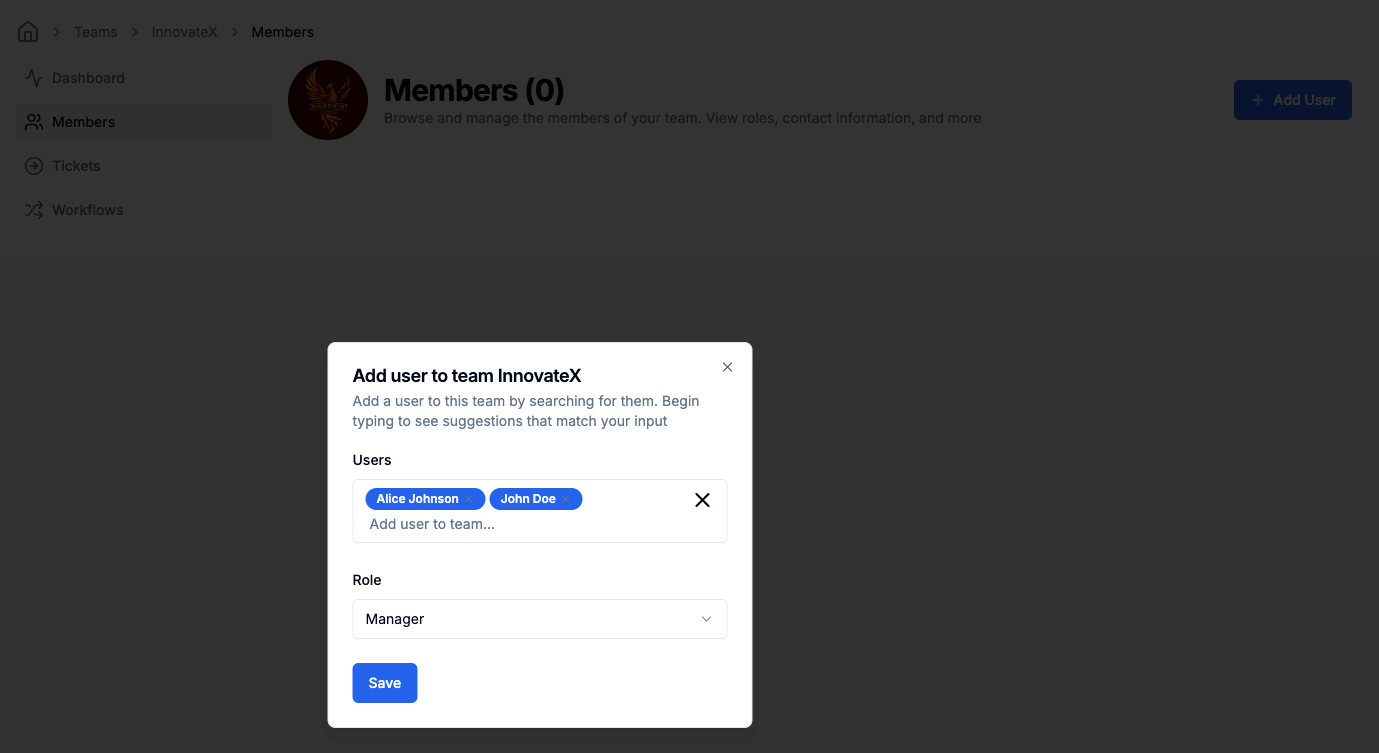
- After the team is created successfully, navigate to the Members section in the navigation sidebar.
- Select Members to manage and add team members.
- You can assign roles to team members based on the following permissions:
- Manager: Has full control over the team, including adding/removing members and managing workflows. The system admin initially assigns managers when creating the team.
- User: Can create and edit team requests.
- Guest: Has view-only access to team details, including members, requests, and workflows.
Last updated on